
Three things have happened in this last year:
(1) I continually look at product shots from other sellers to get an understanding of how I personally like to see an item presented.
(2) I took part in a free online "introduction to your camera" course which I found extremely helpful with regard to using the camera in manual mode to achieve good results. It is my 2017 resolution to actually read the manual for our camera to understand it even better.
(3) I was given a light tent as a Christmas present.
So this post is about using the light tent. I'd been thinking about buying a light tent (or even making one) for some time. I'd read a lot about them, the ups and downs (mostly the downs) and initially came to the conclusion that actually I didn't need one as I take product shots in the conservatory which is flooded with light. However, I was spending an awful amount of time tweaking my photos once they'd been uploaded to the camera, so something was going wrong. Things improved considerably once I'd finished the photography course, but my constant whinging before this had obviously gone unnoticed by my son who, bless, presented me with a light box at Christmas ("it's something you said you needed")! Actually, the light box had to be returned - it would have been brilliant had it not kept collapsing. I exchanged it for a light tent.

The stand is good and sturdy but my DSLR is too heavy for it (I may well be using it incorrectly). I do already have an adjustable stand so this isn't an issue for me.
Some reviewers commented on how hot the lights became. Yes, they do, but I try to remember to turn them off during prolonged setting up and fiddling around sessions so they don't overheat - so far, so good. Another reviewer said they couldn't get the creases out of the backdrops. This didn't seem to be an issue for me, but I was silly enough to hold the iron on the fabric a little too long and have now got a bit of a hole close to where it attaches 😔. Luckily my items are so small it hasn't yet caused a problem - but be warned, iron over a tea-towel or something similar so as not to make the same mistake!
Playing with the tent was interesting. I've learnt that the set up shown above isn't the best way to get a good photo!

Endeavouring to position my little items correctly to get the desired shot has been quite frustrating at times and at one point I was wondering whether all the faffing around was really worth it. However, with continuous playing I'm beginning to get to grips with how the tent will work for me. I use a folded/rolled sheet under the backdrop to get an slanted angle and place a good sized piece of white thin card on top as I find this gives a smoother background for my close up shots.
The following photographs show slight differences in lighting - non have been tweaked at all.
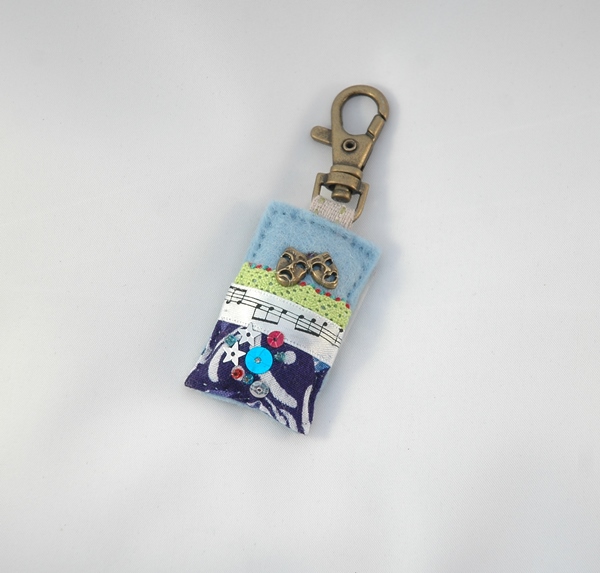

This shot has been taken without the lights. It's the kind of shot I was getting before I used the light tent and although it's OK, it would need a fair bit of adjustment before I was happy to use it.


At times I'm still in two minds as to whether the light tent has been the Godsend I was hoping for, especially when I'm shooting on a sunny day in a room full of windows. However, on those very dull days, it has made a big difference.
I'm now finding it's hard for me to choose which photo I like best from a batch rather than which one will eventually look OK after lots of additional work - and that's a good thing 😊📷.
No comments:
Post a Comment